
The trigger keyboard things are a bit of a mess, I think
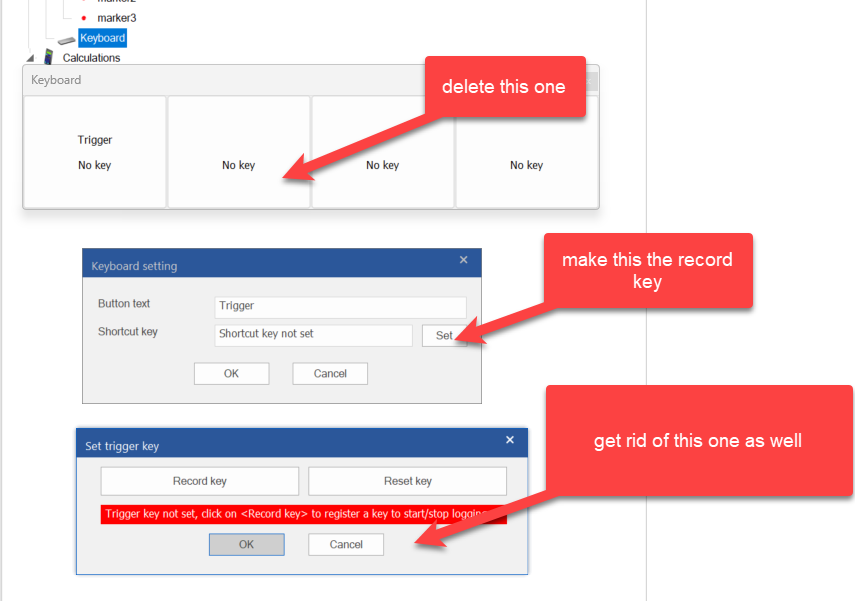
I think the first dialog is a bit of legacy because the first version of the key trigger did not actually hook into key-down messages.
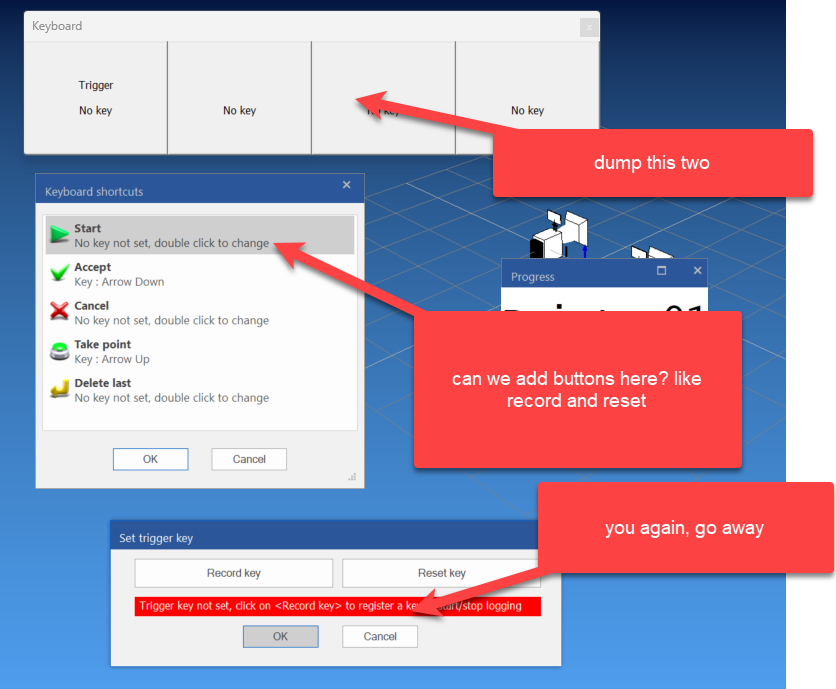
The record/reset is just overkill, Record and Reset could be buttons inside the middle dialog.
So the big four button dialog should go first: IDD_DEVICE_KEYBOARD
The third record/reset should go once we find out how we can add two buttons to the middle dialog.
Be careful here because we are mixing up a number of things. The keyboard interface used during alignment measurements is not related to the keyboard device that we add in the configuration and which is used to trigger measurements during doorslam. So rather then deleting the dialog, we should add the option to show/hide this.
Right, after going through some stuff,.... I believe the Keyboard device (CDeviceKeyboard) is no longer needed since we have keyboard trigger functionality directly in the software, which also works without the Keyboard Device, so for now we just comment it out in CDevicesTreeCtrl::Populate.
Using keys in alignment measurements
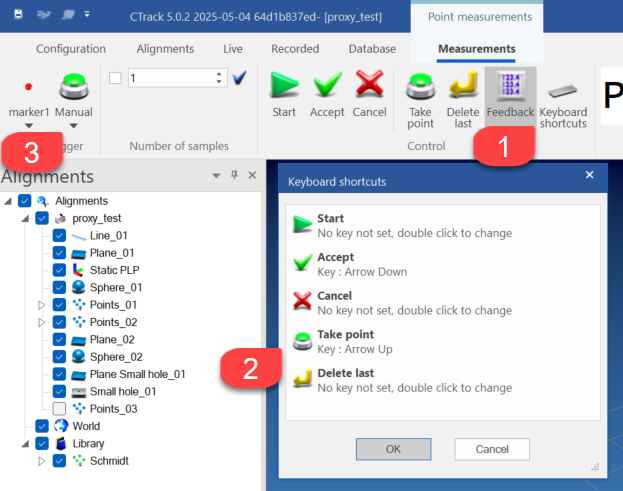
Don't mix up the Start with Take point, which is the one you want for ... taking a point. The dialog follows the order of the buttons in the ribbon bar.
Using keys for repeated measurements
A typical example is a doorslammer who stands next to the car and does not want to go back to the computer to start a measurement.
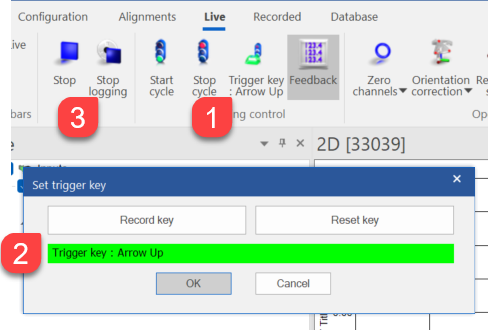
Here we only have to set one trigger key that takes care of starting and stopping measurements. Don't forget to set the infinite loop option in the logging dialog.
So CDeviceKeyboard is still there, but disabled (deprecated) for now, until we have a situation where it is useful.
Taking up the Leica driver
We'll update our knowledge article using the Leica driver procedures.
Getting the Leica software
Latest software is at https://portable-mi.hexagon.com/
Email and usual pasword.
We are at LMF Tracker SDK_Setup V1.10.4.exe
The installer has no options, just lean back and relax.
We find everything under the L of Leica
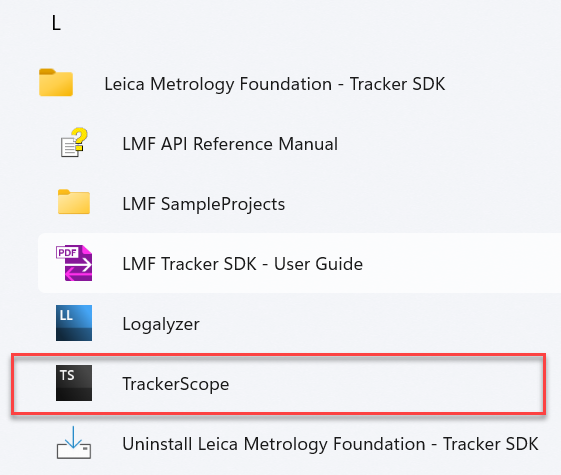
And the main application to run is TrackerScope.
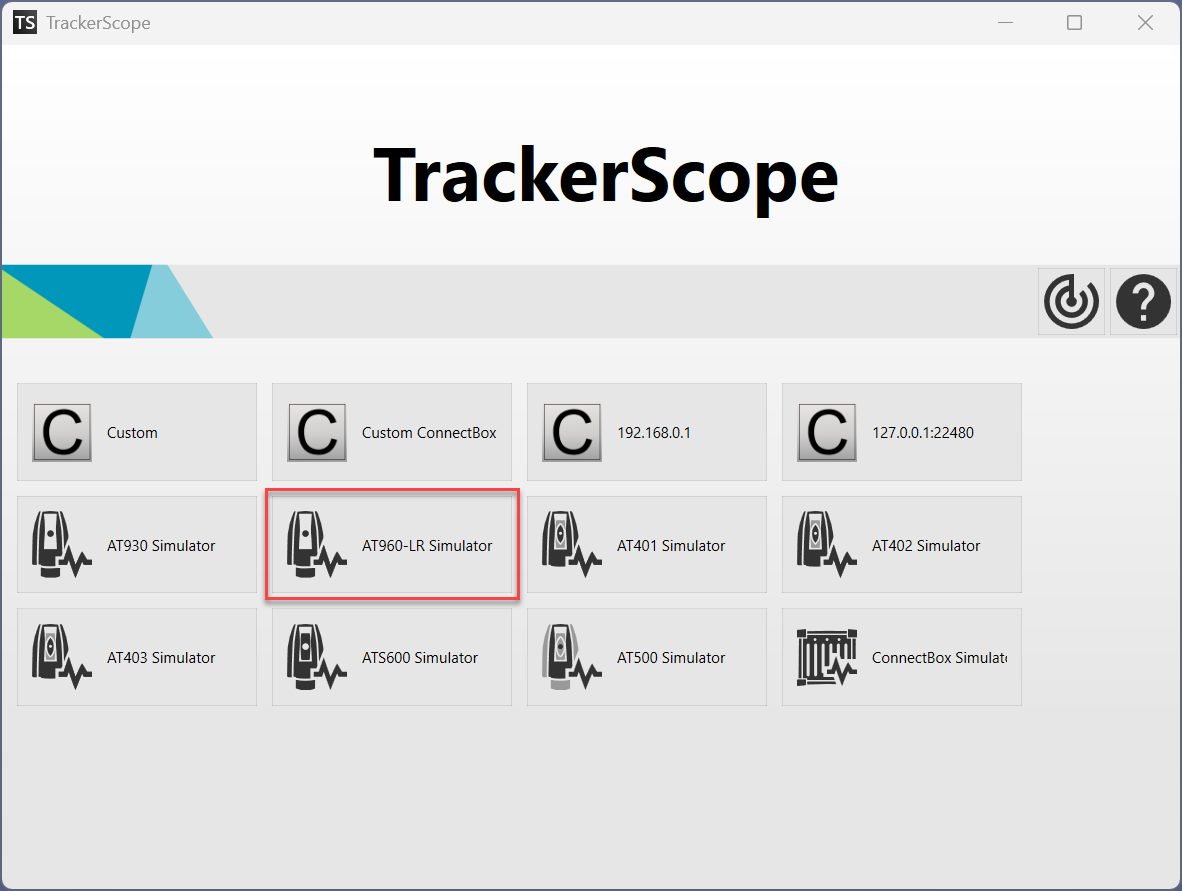
Best choice is the AT960
there is an MFC sample program which may be useful at
C:\Program Files (x86)\Leica Metrology Foundation - Tracker SDK\MFCSampleProject
It is best to copy this over to some other location because the Program Files root will require administrator privileges
I copied the whole Leica directory over to F: and made a local git repository since I'll do a number of changes to adapt to the CTrack settings.
The MFC sample project is only 32 bits. No worries for the proxy approach.
The documentation can be found in
- LMF Tracker User Guide
- LMF API Reference Guide
The MFC sample program has as features:
- 32 bit
- UNICODE
- c++14
- clr 4.8
The Ctrack Leica.LMF proxy driver :
- 64 bit
- UNICODE
- c++17
- clr 4.8