
User
User : jetson
Pwd : a
Pairing MX Anywhere
You're using an NVIDIA Jetson, which runs a Linux-based operating system (usually Ubuntu). While Logitech offers official pairing software (Logitech Unifying Software or Logi Bolt App) for Windows and macOS, you'll need a Linux-compatible alternative to pair your MX Anywhere mouse with a Logitech USB receiver if it doesn't automatically connect.1
The most recommended and widely used tool for managing Logitech Unifying and Logi Bolt devices on Linux is Solaar.
Here's how you can pair your Logitech MX Anywhere mouse with the USB adapter (Unifying or Logi Bolt) on your NVIDIA Jetson using Solaar:
1. Identify your Receiver Type (Unifying vs. Logi Bolt):
- Logitech Unifying Receiver: These are typically small USB dongles with a small orange sun-like icon on them.2 They can connect up to six compatible Logitech devices.3
- Logi Bolt Receiver: These are newer, also small USB dongles, but they have a yellow lightning bolt icon on them. They are designed for enhanced security and performance.4
- The MX Anywhere mouse may come with either a Unifying or Logi Bolt receiver depending on the specific model (e.g., MX Anywhere 2S often uses Unifying, MX Anywhere 3S uses Logi Bolt). The pairing process with Solaar is largely similar for both.
2. Install Solaar on your NVIDIA Jetson:
Solaar is usually available in the standard repositories for Ubuntu (which your Jetson likely uses).5
Open a terminal on your Jetson and run the following commands:
Bash
sudo apt update
sudo apt install solaar
If you want the very latest version (which might be helpful for newer mice or receivers), you can add Solaar's PPA:
Bash
sudo add-apt-repository ppa:solaar-unifying/stable
sudo apt update
sudo apt install solaar
3. Connect your USB Receiver:
- Plug the Logitech USB receiver (Unifying or Logi Bolt) into an available USB port on your NVIDIA Jetson.
4. Launch Solaar:
- You can usually find Solaar in your applications menu (if you're using a desktop environment on your Jetson). Search for "Solaar."
- Alternatively, you can launch it from the terminal:Bash
solaar
5. Pair your MX Anywhere Mouse:
Once Solaar is open:
- You should see your connected USB receiver listed in the Solaar window.
- Look for a button or option like "Pair new device" or "Add new device." Click it.
- Solaar will then prompt you to put your mouse into pairing mode.
- On your Logitech MX Anywhere mouse: Locate the Easy-Switch™ button on the bottom of the mouse (it usually has numbers 1, 2, 3 next to it, allowing you to switch between paired devices).6 Press and hold this button for about 3 seconds until the LED indicator next to the number starts blinking rapidly.7 This indicates it's in pairing mode.
- Some sources also suggest simply turning the mouse off and then back on while Solaar is waiting for a new device.
- On your Logitech MX Anywhere mouse: Locate the Easy-Switch™ button on the bottom of the mouse (it usually has numbers 1, 2, 3 next to it, allowing you to switch between paired devices).6 Press and hold this button for about 3 seconds until the LED indicator next to the number starts blinking rapidly.7 This indicates it's in pairing mode.
- Solaar should detect your mouse, and it will be listed under your receiver.
- Confirm the pairing within Solaar.
Important Notes:
- Initial Plug-and-Play: Often, if your MX Anywhere mouse was originally bundled with that specific receiver, it might work directly by simply plugging in the receiver and turning on the mouse, without needing Solaar. However, if you're using a different receiver (e.g., you lost the original or want to consolidate multiple devices on one receiver), Solaar is essential.
- Bluetooth Interference: If your Jetson has Bluetooth enabled and your mouse was previously paired via Bluetooth, it's a good idea to temporarily disable Bluetooth on the Jetson before attempting to pair with the USB receiver to avoid conflicts.
- Battery Status and Customization: Solaar can also provide battery status for your Logitech devices and, for some models, allow you to configure basic settings (like scroll wheel behavior or button assignments), though it won't have all the advanced features of Logitech Options/Options+ software for Windows/macOS.8
By following these steps, you should be able to successfully pair your Logitech MX Anywhere mouse with its USB adapter on your NVIDIA Jetson.
Installing visual studio code
Nice video to install visual studio code on the Jetson
Install RabbitVCS
This is the Ubuntu version of TortoiseGIT
sudo apt update
sudo apt install rabbitvcs-nautilus rabbitvcs-cli
nautilus -q
Pulling the repos
Authentication
It will not be possible to pull a repo from azure with just your log-in and pasword. You either need to arrange a Personal Access Token, or use a SSH key.
Azure DevOps offers a few ways to authenticate for Git operations. For command-line cloning on Linux, the most common and secure methods are:
- Personal Access Token (PAT) - Recommended
- SSH Key (if you prefer SSH)
Using PAT
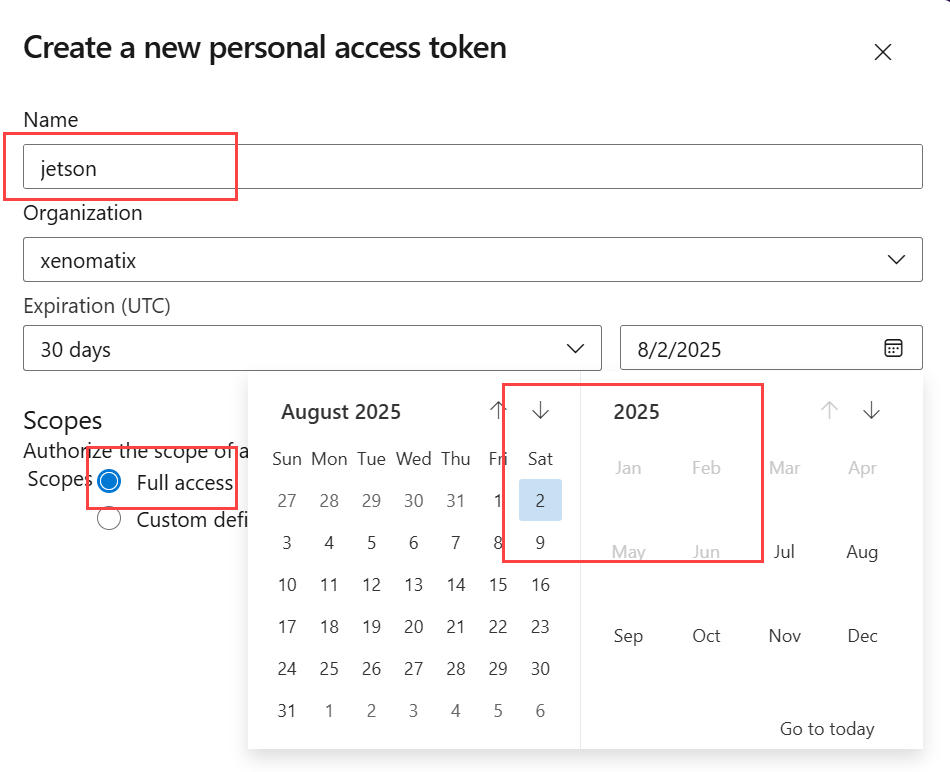
First create a new token in Azure.
Go to Settings · Personal access tokens (Luc Wens) - Settings
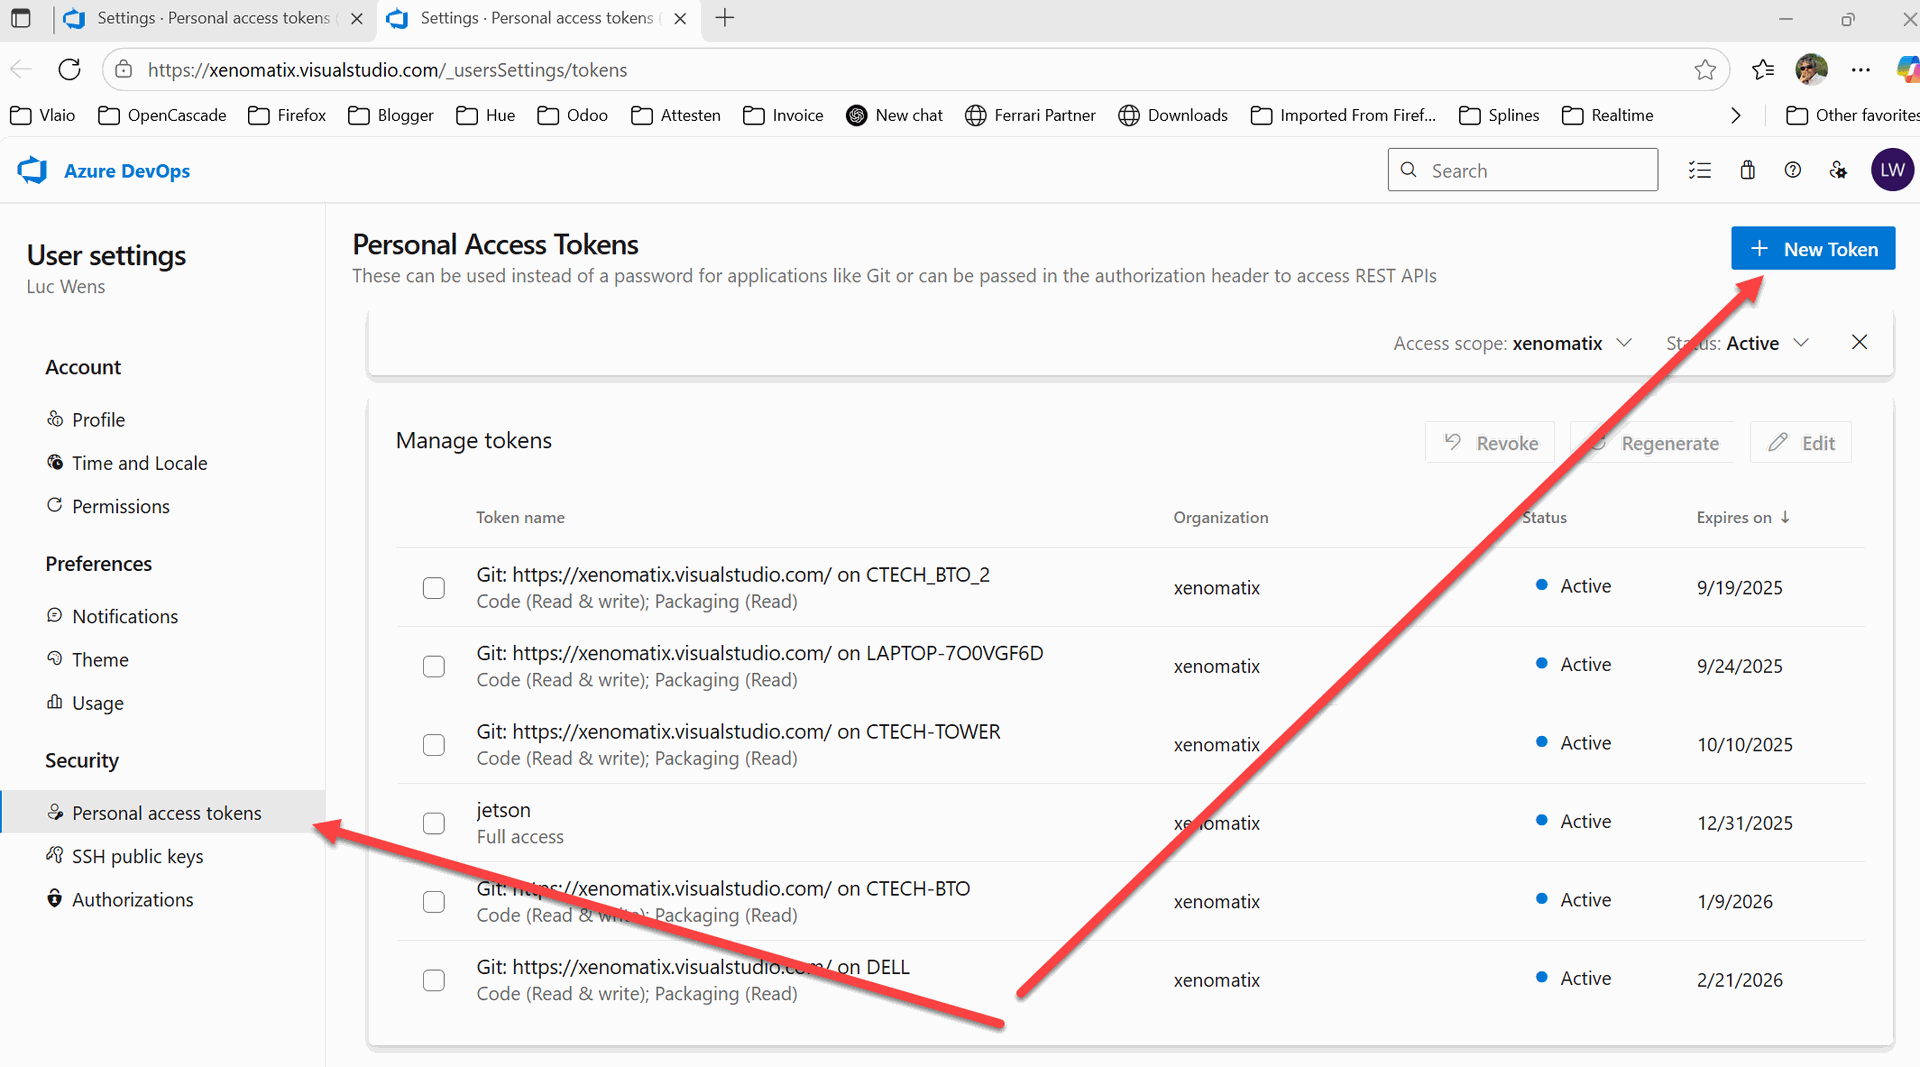
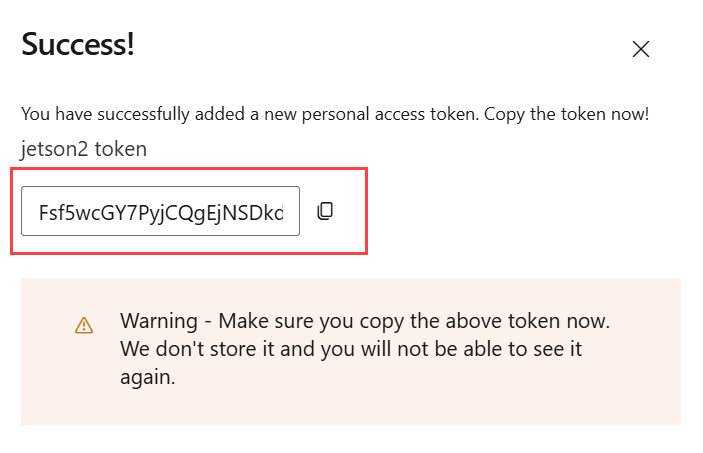
Copy the token and save it somewhere.
Then on the Jetson to clone the repos, go to Home/Projects (this is where I decided to keep all projects):
git clone --recurse-submodules clone https://xenomatix.visualstudio.com/XenoWare/_git/XAI
# and
git clone --recurse-submodules https://xenomatix.visualstudio.com/XenoWare/_git/ObjectCommunicationLibrary
For the authentication, use
- E-mail address
- paste the above copied PAT
And that should work
Update Jetpack
The version I currently have is jetpack 5, there is a jetpack 6 which has Ubuntu 22.04 LTS and which gets closer to the packages used in the 5GAlert project
As this was quite a procedure, i make it in a separate blog. It took almost a whole day to get there.